
Building a Medieval Harp Part 2
by Alyssa Cowell, Catoctin School of Music
In my last post, I shared the beginning of my experience building a medieval harp replica at Folklore Village in early August. The post concluded with a cliffhanger – I had just carved through the side wall of my soundbox! Calamity! Read on to learn how some modern technology saved my 9th century reconstruction:
I asked the instructor, Alice, to give me some advice about carving – I was having trouble understanding why the first side of my soundbox was easy to carve, but the second side was so challenging – we unclamped the soundbox to get a closer look, and discovered that the combination of slightly softer wood and a chisel in need of a sharpening was the likely culprit. To her credit, Alice apologized for not supervising me more carefully – she seemed to feel truly bad about the mistake. While we took a moment to weigh our options, Alice’s husband Steve arrived to check and see if she needed anything. It is my good fortune that Steve happens to be an engineer and has a very level head on his shoulders.
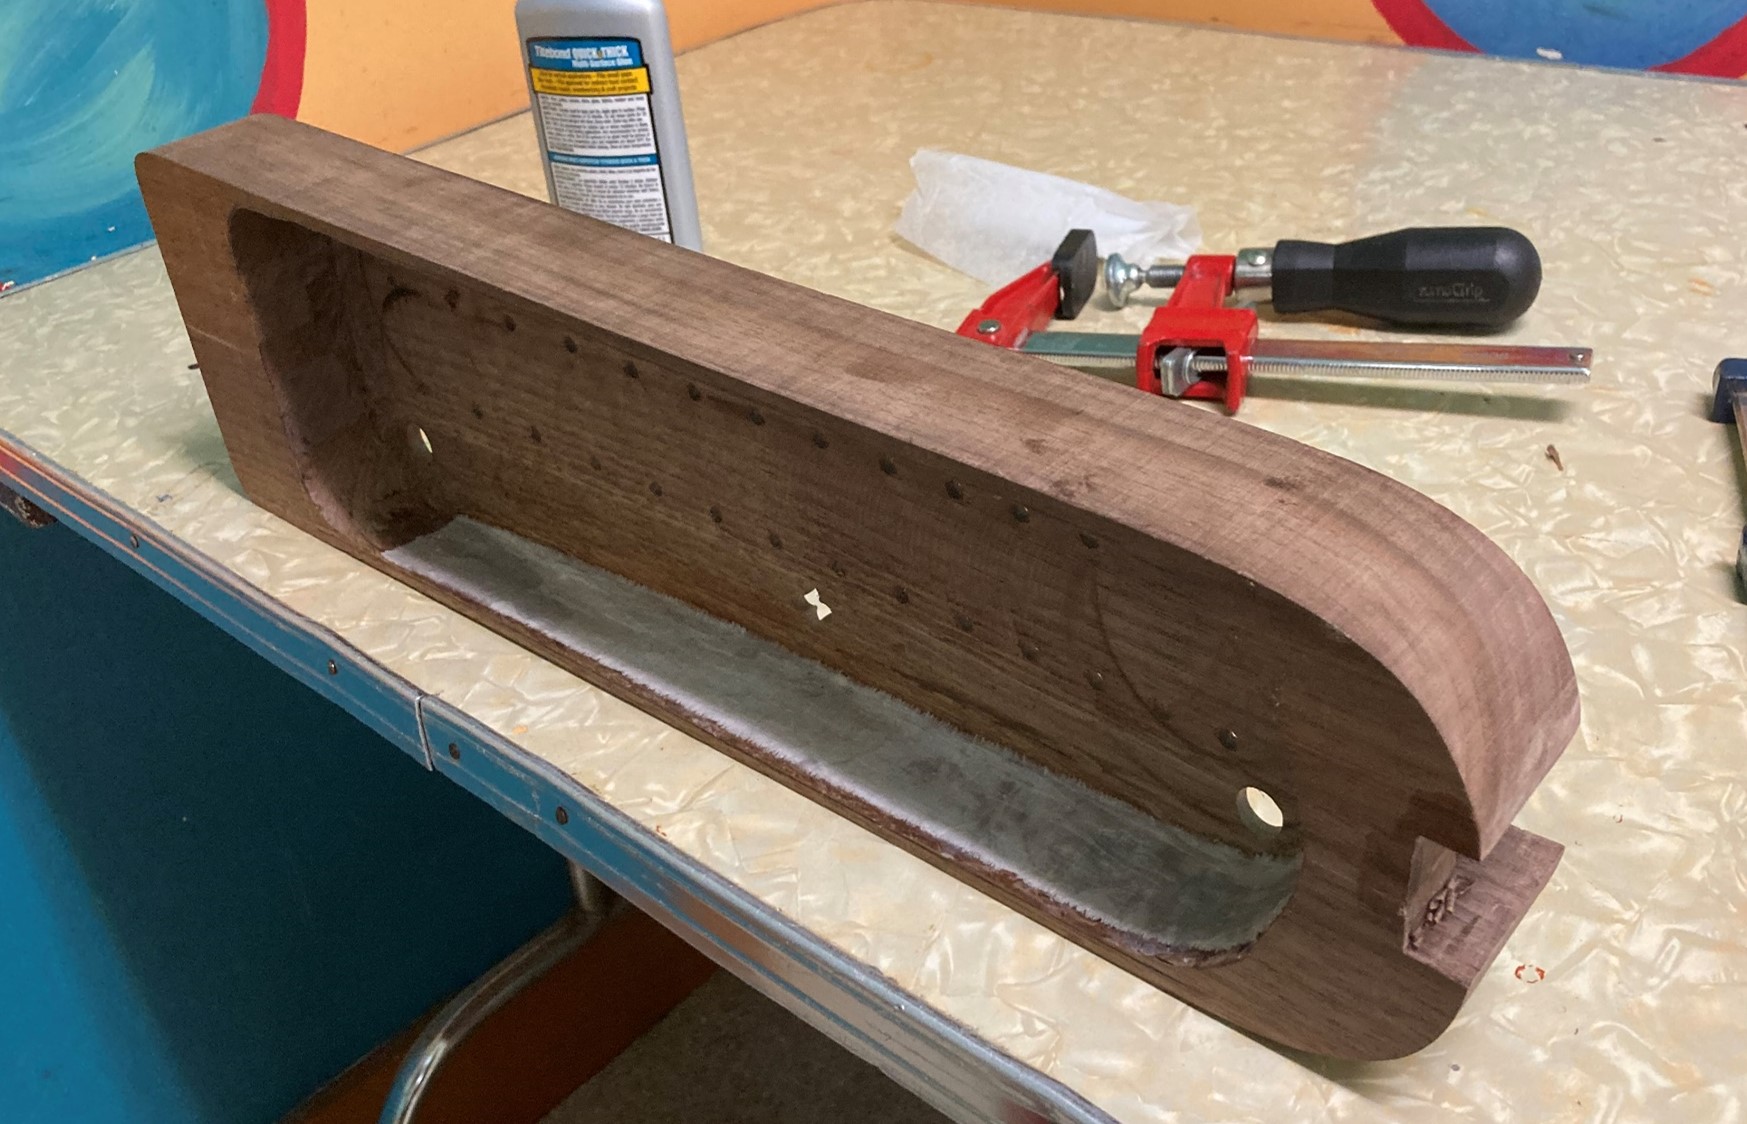
Alice, Steve, and I sat down and looked at the sound box together and brainstormed some ideas for how to solve the problem. Alice suggested that we should cut the side off the soundbox and replace it with a whole new piece of wood. This solution was not ideal, because the repair would ultimately be very visible – the extra wood she had with her was not a good match for the soundbox. Additionally, the time it would take to shape the piece of wood would put my project even further behind due to my flight-delayed late arrival to the first day of class. I tentatively asked if using a modern solution would be an option and suggested that we could reinforce the over-thinned side with epoxy. Steve immediately agreed that it was an excellent way to solve the problem quickly and effectively. While he went to the store, I would collect as many carved shavings as possible to mix with the prepared epoxy and act as a patch to fill in the damage. About a half hour later, Steve returned from the store, and we set about trying to save the soundbox. We started by mixing up the two-part epoxy and applying a layer that we topped with wood shavings. Then we repeated the process a few more times to build up the necessary thickness alternating the grain pattern of the shavings for each new layer, effectively creating a sort of plywood. Reader, I will be honest: the end result is not beautiful, but it should be strong enough to withstand the low tension of this small harp. Luckily, the ugly will be hidden inside the soundbox and will never be seen once the instrument is assembled.
Once Alice had inspected our work, she suggested that we take a piece of fabric and the remaining epoxy and apply a patch over everything as a final reinforcement. I have a sneaking suspicion that she also thought the fix was ugly, and this would be a way to hide it a little, though she did share an anecdote about using glue-infused fabric strips to reinforce the joints on early stave-backed lutes. Perhaps Alice was trying to bring us a little closer to the 9th century.
While we allowed the epoxy to cure, I attended to other parts of my harp. One of my other classmates, Christopher, helped me mark the quatrefoil sound hole on the soundbox back of my harp, and I drilled it out using a large Forstner bit on the drill press. Then it was time to do some shaping of the neck-to-soundbox joint to make sure the neck of the harp would make good contact with the soundbox. This involved a small amount of chiseling and a large amount of sanding. Sanding and shaping took up the remaining parts of day 2, which is where this installment will have to come to a close. Stay tuned for next time for final fitting and assembly!